Showing posts with label Dux Britanniarum. Show all posts
Monday, 5 October 2015
A Small Teaser – Table for Tonight's game
I couldn't resist sharing these pictures with you, showing the setup for tonight's game of Dux Britanniarum. The terrain was set up by my good mate Dalauppror, who has a real talent for making beautiful tables, and this time he really outdid himself.
Buildings, markers, minis and trees by yours truly. The rest of the terrain is from the club.
The game? Well, the Saxons were out to plunder the church but had a really rough nigh. But with two newcomers commanding them and the terrain placement perhaps being a bit too tough on them, this was only to be expected. Still, I think everyone had a good time – I certainly enjoyed visiting this old favourite of mine!
A full report with pictures of the action will be posted in due time.
Tuesday, 18 November 2014
The Fate of Alt Clut – Parts 2–4
A long overdue report on how things stand in our Dux Britanniarum campaign "The Fate of Alt Clut".
We managed to play four games, before taking a break for the summer way back in June. And now, here in November, we're still on that break and I don't think we'll be able to continue with the campaign until some time next year.
Anyway, rather than a detailed account of each game, I'll just do a quick summary and then finish off the post with some thoughts on Dux Britanniarum and the campaign.
The first game was a Pict raid on an Angles village, which ended in a marginal victory for the raiders. You can read more about that game here.
In the second game, it was time for the Picts to test their might against of the Britons of Alt Clut proper. And what an interesting game this turned out to be – it became very clear that playing in a campaign poses and imposes certain challenges on it's own, which is exactly the thing I'm after!
![]() |
| The battlefield, with the church in the middle, surrounded by fields and a garden. The Picts arrive from the top edge, and the Britons from the right edge. |
The Picts had their eyes set on a newly erected church just outside Mygedawc, where the holy relics were said to be of much value and the church's roof clad in gold.
I took command of the raiding Picts while my good mate Dalauppror commanded the staunch Britons – suitably reinforced with some heavy cavalry to hunt down the fast raiders.
Things didn't start too well for the Picts when I rolled two ones in a row: one for my morale roll and one for how many rounds headstart I would get. It seemed I would have to press forward as much as possible to try and get to the church before the Britons could form up a solid defense with their pesky shield walls.
![]() |
| The Britons making a swift advance with their levy, trying to intercept the slow moving Picts screened by their skirmishers and horsemen. |
Unfortunately, my skirmishers got a little too enthusiastic while the other troops advanced far too cautiously. This meant the skirmishers got neutralised pretty quickly, even though they managed to tie up the Briton's cavalry for a while, buying me much needed time. As I found out, the skirmishers were badly needed as a way to soften up the Britons in shield walls before going in with the regular raiders.
![]() |
| The Britons cavalry arrive and immediately get locked in a lengthy chase of the Picts' skirmishers. |
After a couple of rounds of slogging towards the church, with some truly abysmal rolls for movement, it was clear this was not the Picts' day and I decided to withdraw to fight another time. But not before trying one last desperate attempt to get the upper hand: the Pictish Lord lead a mad attack against the British levy in shield wall. However, the only result of this attack was an honorable wound for the Lord and, predictably, some more fleeing Picts. The Britons tried to hunt down the fleeing raiders but only managed to inflict some minor losses after all. Result: a slight win for the Britons.
![]() |
| The Pictish Lord leads a suicide attack on the British levy in shield wall. With predictable result ... |
![]() |
| The Britons closing in on the raiders. |
![]() |
| The Britons' cavalry, finally having destroyed the last skirmishers, makes short work of the Pictish Lord's unit. |
![]() |
| In face of the staunch British defense, the Pictish raiders decide to call it a day. |
![]() |
| And once again peace is restored. Maybe even with a little help from The Man himself? |
The month after the Picts were at it again, raiding a Romano-British farm. This time we switched sides, with me commanding the Britons and Dalauppror the Picts. Once again the raiders came up short as the British cavalry proved just as effective this time – a couple of well-placed charges saw the Pictish morale crumble and they were once again forced to withdraw in humiliating defeat.
Below are some pictures from this game:
![]() |
| An overview of the battlefield: Picts to the north and Britons to the south. |
![]() |
| Pictish cavalry rushing ahead of the main force. "Daddyyyyyyy!!!" |
![]() |
| The Picts arrive first and start to swarm all over the farm, looking for things to knick. |
![]() |
| Eventually the Romano-Britons arrive and everything degenerates into that familiar mosh-pit of Dark Ages fighting. |
![]() |
| Choo! Choo! You're about to get charged by some very angry cavalry. What do you do? |
And so after 4 games and 3 months "in-game time" we have 2 victories for the Romano-Britons and 1 victory each for the Angles and the Picts. As is my general experience the attackers/raiders really need a good plan and some lucky dice rolls to win. It's also obviously of importance where the objective is placed – if it's placed far from the entry point of the attacker, it's going to be a tough match for them to win even with a couple of rounds of head start.
As for the rules themselves, they work fine for the most part but suffer somewhat from under-explanation. The added/adjusted rules for cavalry in the Raiders book, and the following confusion, really highlighted this I think.
I won't blame all the problems on the text though, as some of it is us, the players, coming to the game with a pre-conception of how things should be. When things aren't very clearly spelled out, we tend to fall back on how things usually work in our interpretations, which with rules such as these – with hidden depths, and elegant interactions between the different parts – makes for a somewhat confusing experience. It's easy to miss the smaller nuances, glossing them over in a quick read-through, when you think you already know how things work.
To be fair, the author has tried very hard to try and answer any questions but I really think there should be an updated version, with better explanations, or maybe simply a compiled FAQ-document like the one for Chain of Command.
I must confess that personally, my initial excitement for Dux Britanniarum has begun to wane a bit. Maybe this break was a good thing after all, giving us time to let the excitement build again. Because eventually, I really do want to continue with this campaign. The fate of Alt Clut still hangs in the balance ...
Thank you very much for reading!
And finally a big thank you to Michael/Dalauppror for supplying me with all the pictures for this post!
Update: Hey everyone, I didn't mean for this to turn into "let's bash Dux Britanniarum" and scare anyone away from this most excellent game. We've played close to 20 games of it by now – more than any other game I've ever played! – and it's really been tremendously fun.
My comments on its shortcomings were just to say that I think a great game could be even better. I would be very happy with an updated version with some tidying up of the text, together with some more and better explanations/clarifications and examples. Failing this, I'd be satisfied with a regularly updated FAQ-document.
Friday, 16 May 2014
The Fate of Alt Clut – Part 1: Introduction
After lots of talking – and lots of painting and terrain building on my part – we finally kicked off our new Dux Britanniarum campaign last Monday.
I choose to base the campaign in Alt Clut, the northernmost kingdom of the Britons. Here they are trapped between the raiding Picts in the north, primarily from the Pictish kingdom of Fib, and the aggressively expanding Angles in the east, primarily raiding from the former British kingdom of Bernaccia.
As you can see, this is a three faction campaign and we will use the simple rules from the Raiders book to determine who has the initiative in each month, and gets first say as to what they want to do. This will be a pretty loose campaign, with whoever showing up commanding one of the forces – but in theory I suspect it will just be Michael/Dalauppror and me for the most part.
As I'm keen to try out all the factions (this being is our first campaign in Dux Britanniarum proper, rather than some sort of tweaking for another period) we'll be alternating between them, so that no one will play eg the Picts for the whole campaign.
To begin with, we plan to do one full campaign year and then we'll see about continuing. Alt Clut is a one-province kingdom, which means the total campaign shouldn't last too long. However, three forces still means quite a lot of games: 8 raiding months per year, with a possible 2 games per month makes it a maximum of 16 games for the year. Though in practice I think it'll be much fewer than that.
For the first game, rather than roll for initiative I simply decided that the Picts had the initiative and would raid an Angle village, as we were eager to test out the new Raiders' rules.
Dalauppror set up the table in his usual excellent way and away we went. We had another guy from the club, Jesper, joining us and he got to command the Picts while Dalauppror took the Angles and I acted as game master/referee. I got so caught up in the game, I forgot to take pictures, but luckily Dalauppror managed some snaps so a big thank you to him for letting me use these in this post!
The Picts had a whole four rounds headstart, but some not too great rolls for movement meant they had just reached the outskirts of the village before the Angles turned up and the fighting began.
![]() |
| The table at the start of the game: the Picts have arrived from the top-most edge and made their way to the village, while the Angles have just arrived, ready to drive the raiders away. |
A group of Picts managed to enter one building and quickly found all the loot they wanted (the raider's special rules for looting paid off nicely), while their comrades outside managed to hold their ground against the on-coming Angles.
![]() |
| The Picts are getting ready to plunder the barn, while the Angles are getting ready to attack the intruders. |
![]() |
| The Angle's elites arrive, to try to even out the odds a bit. |
The Picts proved to be tough fighters and drove some of the Angles off, much thanks to some well-placed flank charges (nice use of Carpe Diem cards). However, they were now pretty badly beaten up and hard pressed from the Angles who had managed to reform their forces before it was too late.
![]() |
| The battle seesawing: while the Angle's elites press forward to the left in the picture, the Picts have pushed back the other Angels (to the right) and set them up for a charge by the cavalry. |
The Picts would replace their casualties and be ready to raid in the next month (April). The Angles in turn, would need to 2 months before they were up to full strength (May). As a result we decided that the Angles would not raid this month and as the Britons could not do anything (they can only initiate actions when they have lost lands) this meant the first month/round of the campaign was over.
In the next round the Angles will again not raid, preferring to wait until all their losses are replaced, and the Picts will therefore be free to act however they want. Rather than raid the now weakened Angles, we thought it would be more fun to pit them against the Britons. So the next game will be Picts against Britons.
It was great to finally start up the campaign, and to return to Dux Britanniarum – it's still by far my favourite game and campaign system, even though it's not without its faults (mainly in the presentation/text).
It's been a while since we last played the game, and I'm not sure Jesper had actually played it before, so we were a bit rusty. We spent some time flicking through the rules (which, let's face it, could be better presented and explained) which was only expected. We also made a couple of mistakes, but nothing too game changing I think. Overall, a great start to the campaign and I'm really looking forward to continuing.
Thanks for reading – have a nice weekend everyone!
Friday, 7 March 2014
Pictish Raiders
From the north they came ...
A month or so back, I realized I hadn't put up any pictures of the Pict raiding force I finished last year, so when I got the time I arranged some terrain and took some photos. Then things got in the way, as they have a tendency to do, and it took me a good while to sort out the pictures – but this week I finally took the time to finish the last few of them.
The whole warband ready to raid (click for larger image).
The force consists of the following models: one Lord with a champion and standard-bearer (the last one is for decoration only and have no effect in the Dux Britanniarum rules), one minor Noble, one group of four bow-armed skirmishers (should be crossbows according to the rules apparently, but there you go), one group of four skirmishers armed with javelins, one group of four skirmish cavalry and four groups of six raiders each.
Here is the Lord Gartnait son of Girom with his champion Caltram son of Uoret to his right. Behind him stands the trusty standard-bearer Lutrin and to the left stands proud Erip son of Domelch, a minor Noble.
Skirmishing cavalry, armed with javelins.
Skirmishers with bows.
Skirmishers with javelins.
First group of raiders.
Second group of raiders.
Third group of raiders.
Fourth group of raiders.
The miniatures are an eclectic mix of Black Tree Design, Gripping Beast, Old Glory and West Wind. Shield transfers and banner from Little Big Men Studios.
With the long (looong!) awaited Raiders supplement for the excellent Dux Britanniarum from Too Fat Lardies finally being about to be released – "in the beginning of April" is that I'm hearing – I'm getting very excited to at last be able to field this force.
Thanks for looking, have a great weekend everyone!
Saturday, 25 January 2014
Dark Ages Saxons 7
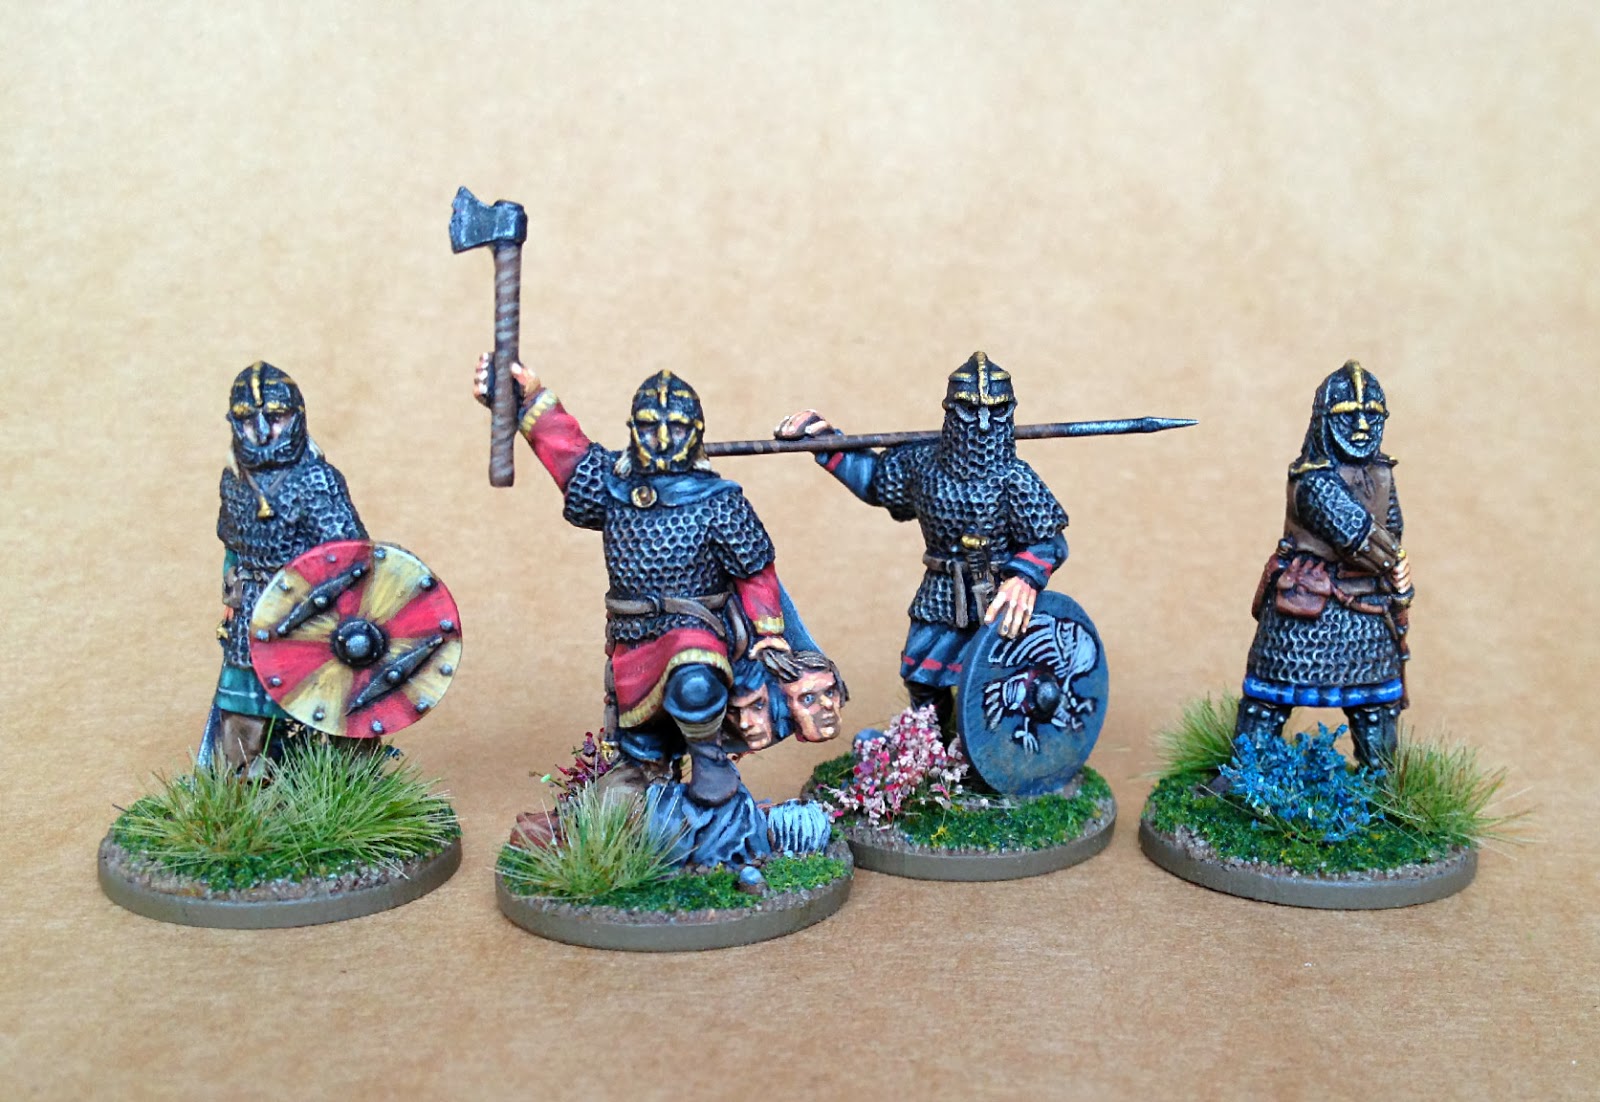
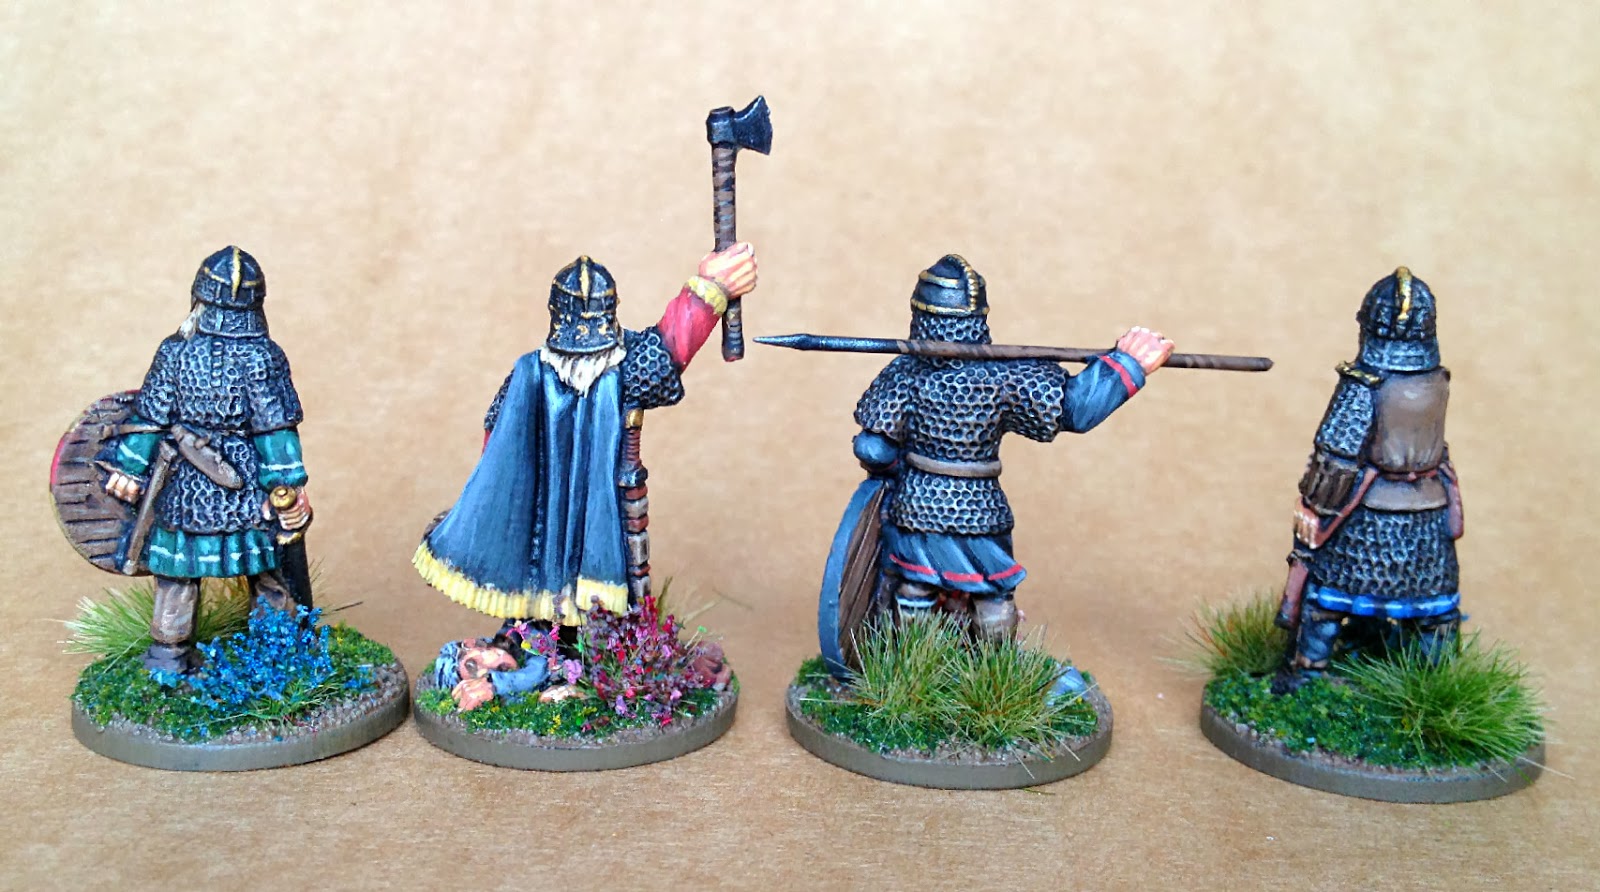
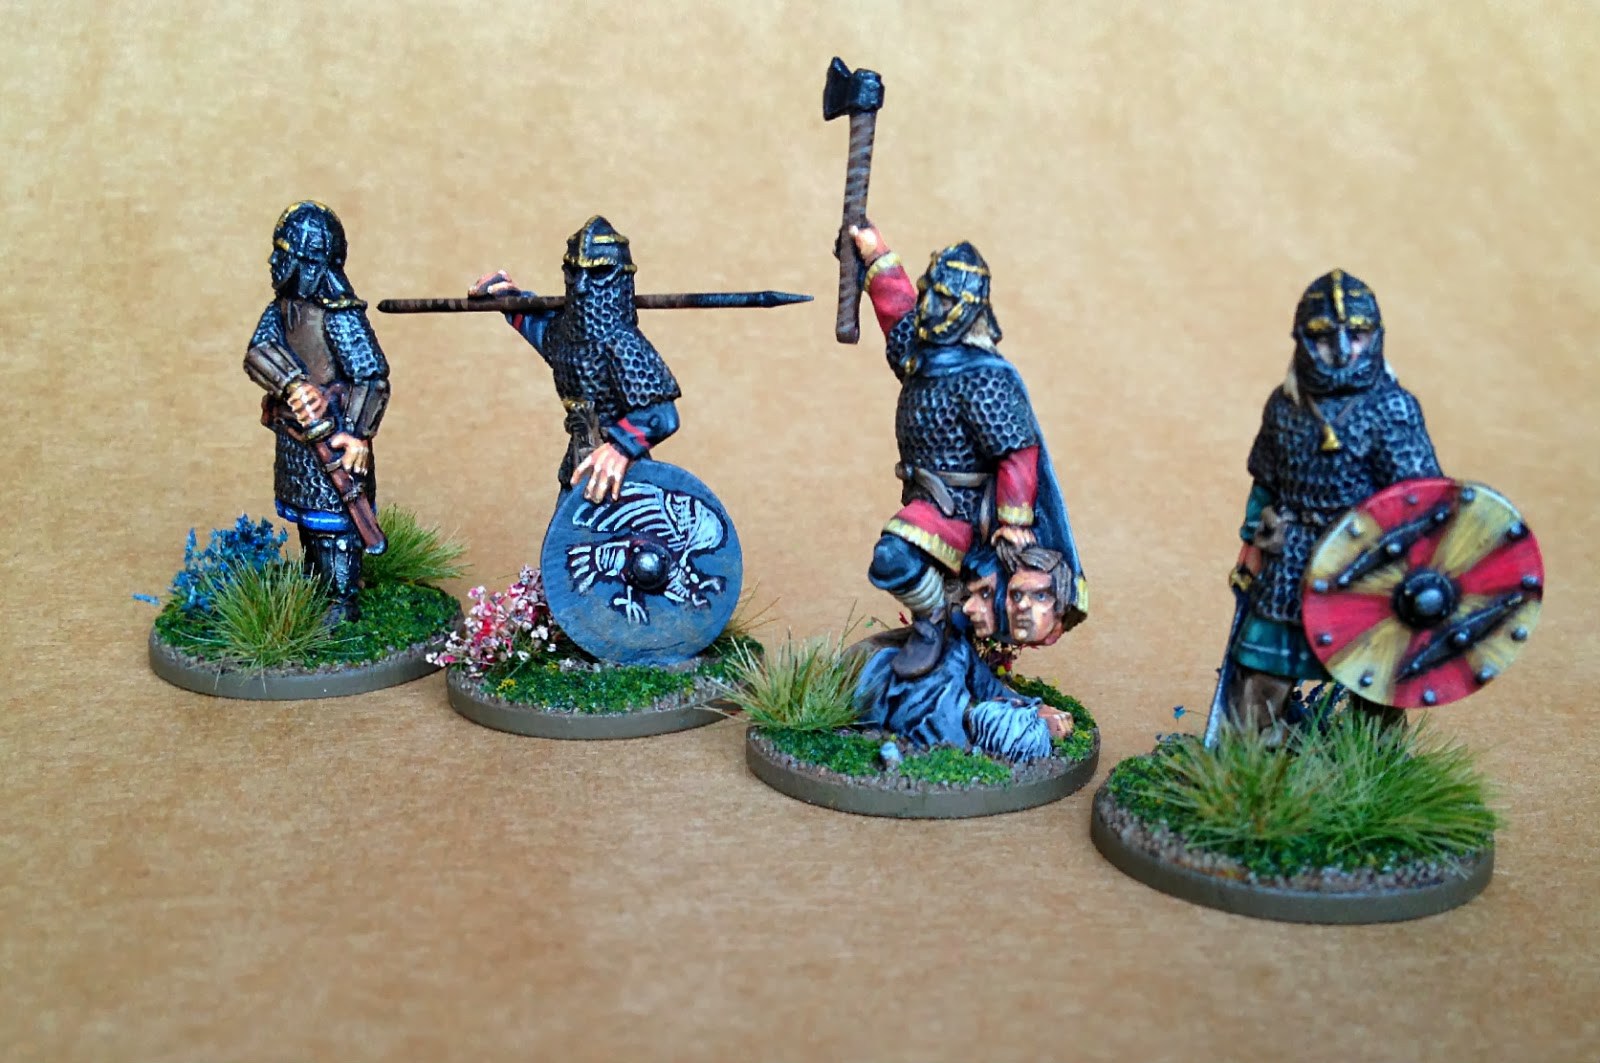
May I present to you the commanders of the Saxon warband: the ætheling Æescwine and his champion Ceowulf, accompanied by the adlings Eadric and Eadbald.
These are the final miniatures for my Saxon warband for Dux Britanniarum. The models are all from Gripping Beast and may actually be off by a hundred years or so, more suitable for the 6th century than the 5th. However, I didn't like the look of the ones in the West Wind Miniatures command set, and the characters from Musketeer, while excellent sculpts, look a little too meek for my taste. So I went with these miniatures from good old Gripping Beast – they had just the right look of cold-blooded murderers I was going for, coupled with some excellent arrogant poses. And the Penda model is just so over the top, I had to use it for my warlord.
For the shields, I've used a new approach: the noble's shield is hand painted while the bird on the champion's shield is an overpainted transfer from Little Big Men Studios. It's not perfect by any means (most notably, I didn't manage to blend the edge of the transfer), but I'm pretty happy with how it turned out – especially for a first try – and I definitely plan on using this technique more in the future.
With these miniatures done, the whole warband is now finished. It's always a nice feeling completing a project, but I'm particularly pleased with this one as it took longer than planned. I will do a photo shoot with the whole force when I get the time. Hopefully, I will get to field them in a game soon too, as I think they're eager to steal some cattle and gold – and kick some Briton behind of course.
Thanks for looking!
![]() |
| Noble, Lord, Champion and Noble. |
These are the final miniatures for my Saxon warband for Dux Britanniarum. The models are all from Gripping Beast and may actually be off by a hundred years or so, more suitable for the 6th century than the 5th. However, I didn't like the look of the ones in the West Wind Miniatures command set, and the characters from Musketeer, while excellent sculpts, look a little too meek for my taste. So I went with these miniatures from good old Gripping Beast – they had just the right look of cold-blooded murderers I was going for, coupled with some excellent arrogant poses. And the Penda model is just so over the top, I had to use it for my warlord.
For the shields, I've used a new approach: the noble's shield is hand painted while the bird on the champion's shield is an overpainted transfer from Little Big Men Studios. It's not perfect by any means (most notably, I didn't manage to blend the edge of the transfer), but I'm pretty happy with how it turned out – especially for a first try – and I definitely plan on using this technique more in the future.
With these miniatures done, the whole warband is now finished. It's always a nice feeling completing a project, but I'm particularly pleased with this one as it took longer than planned. I will do a photo shoot with the whole force when I get the time. Hopefully, I will get to field them in a game soon too, as I think they're eager to steal some cattle and gold – and kick some Briton behind of course.
Thanks for looking!
Friday, 17 January 2014
Dark Ages Saxons 6
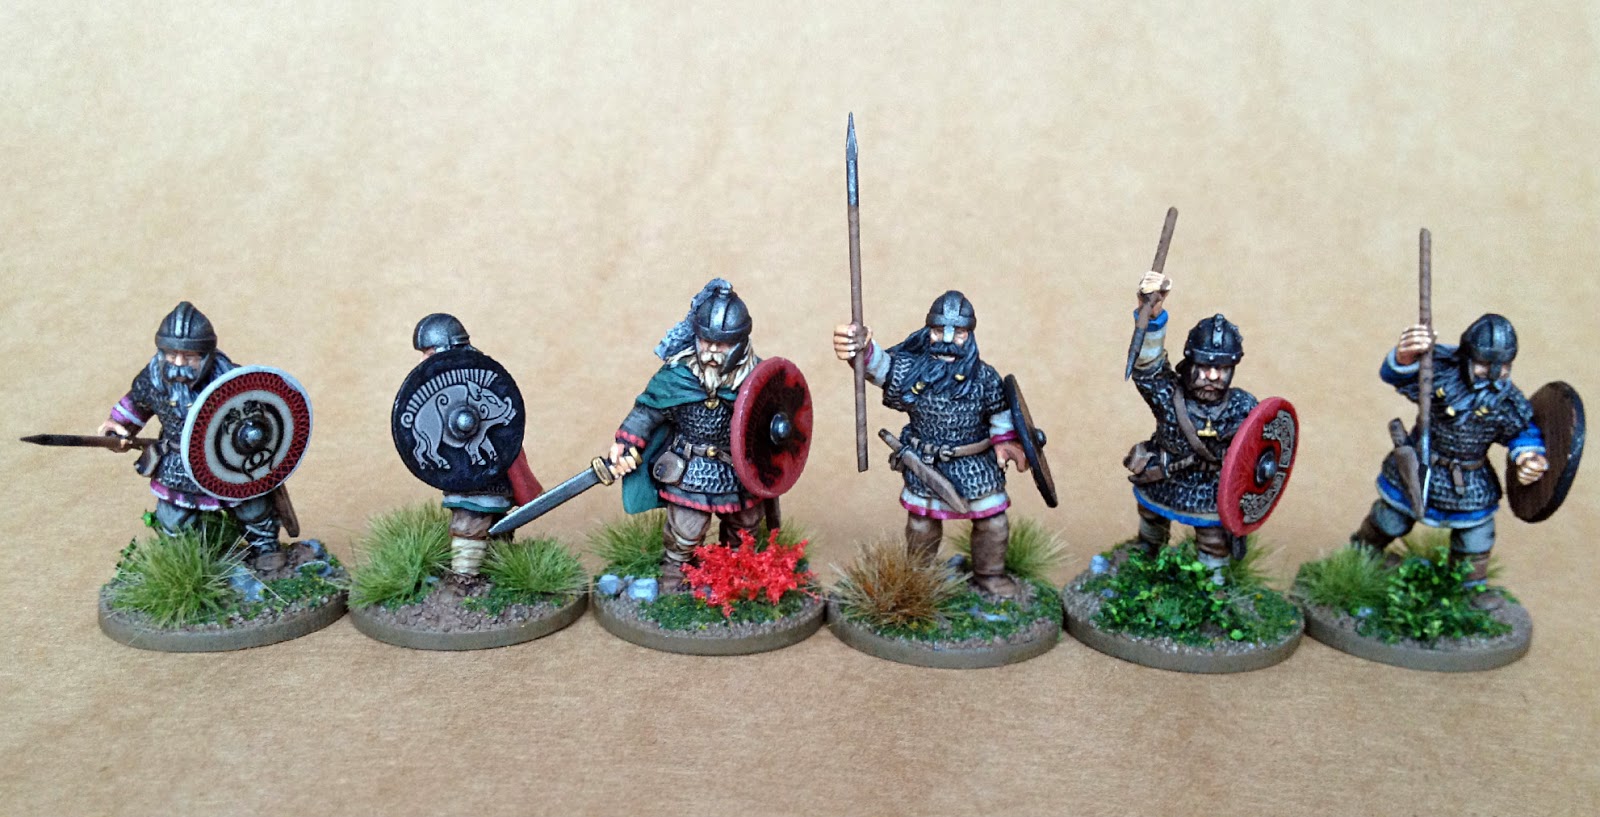
This week I have finished the second unit of gedrihts for my Saxon warband for Dux Britanniarum.
The miniatures are mainly from Musketeer Miniatures with one model from West Wind mixed in for a bit of variety (the miniature with the blue cloak in the pictures).
Shield transfers, as usual, from the great Little Big Men Studios. The shields are in the same style as the other unit's to set them both apart as elites.
This is the final regular unit for this warband, and all that's left to paint now are a couple of characters.
Thanks for reading, have a great weekend everyone!
The miniatures are mainly from Musketeer Miniatures with one model from West Wind mixed in for a bit of variety (the miniature with the blue cloak in the pictures).
Shield transfers, as usual, from the great Little Big Men Studios. The shields are in the same style as the other unit's to set them both apart as elites.
This is the final regular unit for this warband, and all that's left to paint now are a couple of characters.
Thanks for reading, have a great weekend everyone!
Sunday, 12 January 2014
Dark Ages Saxons 5
After almost two months I can at last post another update to my Saxon project. I had just begun painting this unit when work hit me hard and this project was completely halted. But during the Christmas vacation I finally had the time to continue with these miniatures and here they are at last – the first unit of gedrihts, the elite warriors of the Saxons. As such they are suitably armoured up and clad in the some of the brightest coloured and finest patterned clothing this side of the Mare Germanicum.
The miniatures are from Musketeer and West Wind. To be honest, when it comes to these particular miniatures, the quality of the sculpts of former is leagues above the latter, but it's always nice with some variety in a skirimish warband.
The shield transfers are from Little Big Men Studios. I went for a sort of unified look with the shields, to try and tie the warriors together as a unit.
The second unit of gedrihts is on the painting table at the moment, and should be ready next week.
Thanks for looking! Have a great week everyone!
![]() |
| The second miniature from the right is from West Wind, the rest are from Musketeer Miniatures. |
The miniatures are from Musketeer and West Wind. To be honest, when it comes to these particular miniatures, the quality of the sculpts of former is leagues above the latter, but it's always nice with some variety in a skirimish warband.
![]() |
| Not a sight you are likely to see very often! |
The shield transfers are from Little Big Men Studios. I went for a sort of unified look with the shields, to try and tie the warriors together as a unit.
![]() |
| Tough guys spoiling for a fight. And a good look at the lovely shield transfers from LBMS. |
The second unit of gedrihts is on the painting table at the moment, and should be ready next week.
Thanks for looking! Have a great week everyone!
Sunday, 17 November 2013
Dark Ages Saxons 4
Here is the final group of warriors for my Saxon warband for Dux Britanniarum.
The miniatures are from Musketeer and West Wind (the second mini from the right, in the picture above), and the shield transfers are from Little Big Men Studios.
And a final look at these hairy fellas.
With the rabble done, I can now concentrate on the elite gedriht and the characters. My plan is to use a bit more colour on these, and with more patterns on their clothes, to make them stand out against the muted palette of the skirmishers and common warriors.
Thanks for looking!
The miniatures are from Musketeer and West Wind (the second mini from the right, in the picture above), and the shield transfers are from Little Big Men Studios.
And a final look at these hairy fellas.
With the rabble done, I can now concentrate on the elite gedriht and the characters. My plan is to use a bit more colour on these, and with more patterns on their clothes, to make them stand out against the muted palette of the skirmishers and common warriors.
Thanks for looking!
Sunday, 10 November 2013
Dark Ages Saxons 3
This past week has been crazy busy at work and as a consequence I've come home most nights feeling utterly knackered. Despite this I've still found the time and energy to press on with the Saxon horde through sheer force of will (well, almost!), and here is the result of that feat: another unit of warriors.
The miniatures are the usual mix of Musketeer and West Wind, with shield transfers from Little Big Men Studios.
As you can see, I'm still experimenting with my photo setup. I think the daylight bulbs I'm using may be a bit too bright, as they kill some of the more subtle tones. It's most noticeable on the blue cloak in the picture above – it doesn't look quite as flat in reality!
Unfortunately, it looks like the situation at work will continue for a couple of more weeks, maybe even as long a until Christmas, and I'm not sure if I'll able to keep up the desired pace in this project during this time. We shall have to see I guess ...
Thanks for reading and have a great week everyone!
![]() |
| L to R: Musketeer, West Wind, WW, M, M, M |
The miniatures are the usual mix of Musketeer and West Wind, with shield transfers from Little Big Men Studios.
As you can see, I'm still experimenting with my photo setup. I think the daylight bulbs I'm using may be a bit too bright, as they kill some of the more subtle tones. It's most noticeable on the blue cloak in the picture above – it doesn't look quite as flat in reality!
Unfortunately, it looks like the situation at work will continue for a couple of more weeks, maybe even as long a until Christmas, and I'm not sure if I'll able to keep up the desired pace in this project during this time. We shall have to see I guess ...
Thanks for reading and have a great week everyone!
Sunday, 3 November 2013
Dark Ages Saxons 2
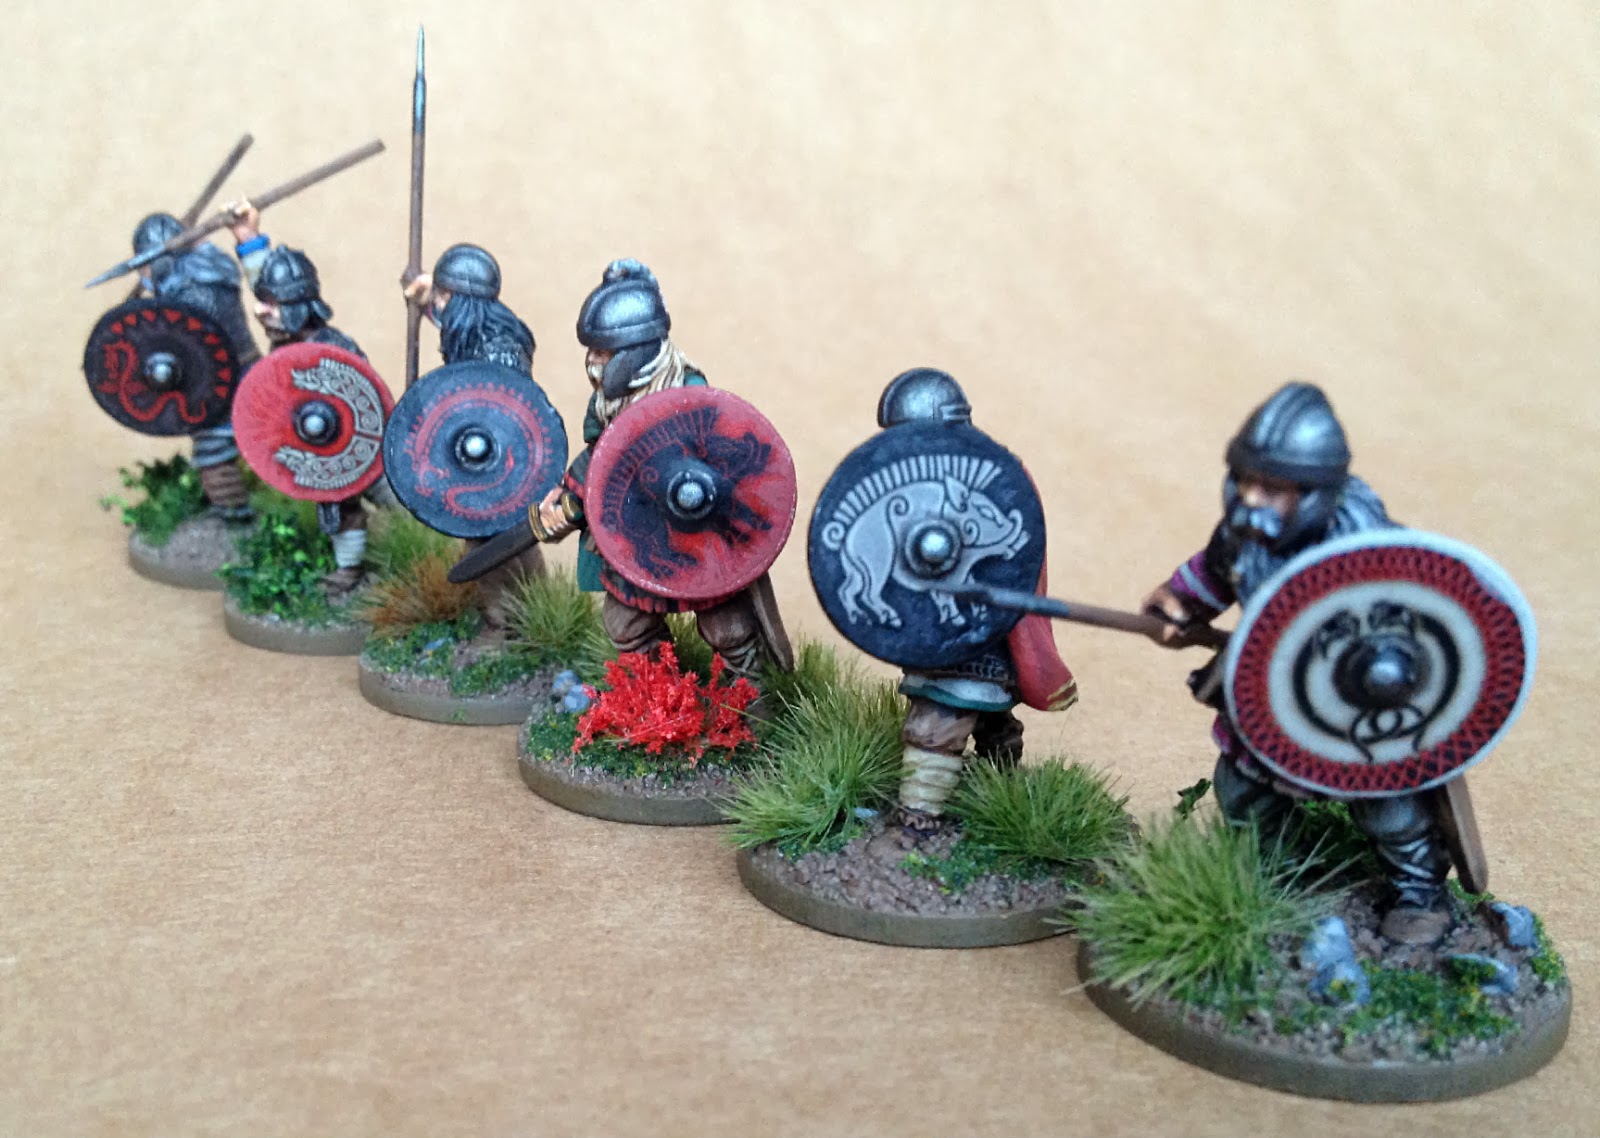
The Saxon horde continues to grow this week with the addition of the first group of warriors. These are a mix of duguth (older and more experienced warriors) and geoguth (younger up and comers). This bunch of hairy raiders is little more colourful than the skirmishers – but not by much and mainly thanks to their shields!
The miniatures are from West Wind and Musketeer and the shield transfers are from Little Big Men Studios. The Musketeer models are quite nice, but I would have liked some even more menacing looking types. Also, there were quite a bit of flash and mold lines on the miniatures, which made cleaning them up a bit of a chore. I really don't like cleaning up models ...
I've been experimenting with my new daylight bulbs and an improvised lightbox. It think the photos came out all right for a first try, but it will take some more trial and error before I'm satisfied.
Finally, a warm welcome to the new followers Panzer Kaput and Legion Games (do you have a blog, I couldn't see one linked from your profile?).
Thanks for looking everyone, there will be more Saxons in a week or so!
![]() |
| L to R: Musketeer Miniatures (MM), MM, MM, West Wind, MM, MM |
The miniatures are from West Wind and Musketeer and the shield transfers are from Little Big Men Studios. The Musketeer models are quite nice, but I would have liked some even more menacing looking types. Also, there were quite a bit of flash and mold lines on the miniatures, which made cleaning them up a bit of a chore. I really don't like cleaning up models ...
I've been experimenting with my new daylight bulbs and an improvised lightbox. It think the photos came out all right for a first try, but it will take some more trial and error before I'm satisfied.
Finally, a warm welcome to the new followers Panzer Kaput and Legion Games (do you have a blog, I couldn't see one linked from your profile?).
Thanks for looking everyone, there will be more Saxons in a week or so!
Subscribe to:
Posts (Atom)